Making a Welding Helmet for PUBG Mobile
Description
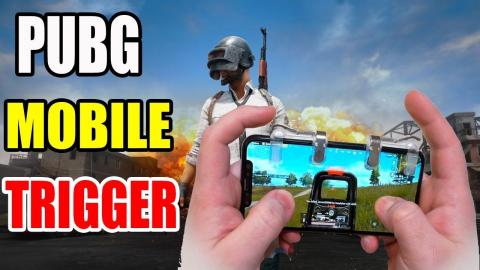
I decided to turn PUBG Mobile's iconic level 3 helmet into a functioning welding helmet! Thanks to PUBG Mobile for sponsoring this video, and you can click the link to download PUBG Mobile for free:
http://www.inflcr.co/SH1wr
Subscribe to my channel: http://bit.ly/1k8msFr
Second Channel: http://bit.ly/iltms-2
MORE PROJECTS, POSTS AND EVENTS
http://www.iliketomakestuff.com
TOOLS & SUPPLIES WE USED(affiliate links):
Base Helmet: https://amzn.to/2x34u38
Freud Plastics Blade: https://www.amazon.com/dp/B00004T7AL?tag=ilik-20
https://kit.co/iliketomakestuff/my-woodworking-tools
https://kit.co/iliketomakestuff/shop-safety-gear
I WROTE A BOOK!!
http://www.iliketomakestuff.com/makingtime
Want to support ILTMS? Get exclusive content and more...
http://www.iliketomakestuff.com/patreon
BUY A SHIRT, STICKER, NOTEBOOK, DIGITAL PLANS and MORE!!
http://www.iliketomakestuff.com/store
FOLLOW:
http://twitter.com/iliketomakestuf
http://www.twitch.tv/iliketomakestuff
http://instagram.com/iliketomakestuff
http://facebook.com/iltms
MUSIC: http://share.epidemicsound.com/iltms
For this prop build, I decided to start with an existing replica military-style helmet. T he helmet I used was made for airsoft and wasn't an actual tactical helmet. It is ABS plastic that I found on Amazon. This was great for a few reasons; it was less expensive than a surplus military helmet, and I could used acetone welding to connect things to it or to alter it if needed. The helmet also came with a clear plastic face shield that I could use if necessary. There were also face shield attachment points already installed on the helmet which was one less step as well.
If you are interested in prop making from films or video games, look into existing pieces so you can achieve a greater level of accuracy and it helps with workload. I used the life-cast of my head as a helmet stand while I put this prop together. In the game there is a very specific chin piece that this helmet did not have. Because I had a lot of work to make it a welding helmet, I chose to just use the military-issue chin strap that the helmet shipped with.
The most iconic element of this helmet is the face shield. It looks like an older welding mask but dangerously short for your face. I would imagine that the helmet in the game is supposed to made entirely of metal, but we're going to fake it. My plan is to bend a sheet of clear acrylic into the helmet's curved contour, add the eye piece, and then paint the whole thing to look like metal. To bend the left-over acrylic sheets, I used my powder coating oven (essentially a toaster oven) set to around 200 degrees F. I experimented with the heating times and found that the thinner acrylic took about 7-10 minutes to become pliable enough to bend without loosing their rigidity.
After bending the sheet, I drew the outline of the mask, based on some reference photos, directly onto the plastic. I cut the shape with a cutoff wheel on my Dremel tool. Drilling the attachment holes were troublesome. First, I used a brad-point bit in reverse on my drill before drilling slowly and it cracked the plastic. I had to start over and this time, I used a step bit to gradually drill the hole to the appropriate size and it worked super well.
The eye piece juts out from the face shield and I made this element from more clear acrylic. Using a bendable curve matching tool, I transferred the face shield contour shape to more clear acrylic. This shape became the top and bottom of the eye piece. After adding the sides and a thin front frame, the eye piece was ready to attach to the face shield with some acrylic cement. I built up some more layers of acrylic to mimic some of the other random helmet elements and glued them in place. Instead of actual rivets that the game helmet used, I modified some rounded tack and glued them in place to really solidify the metal look.
At this point, the prop helmet didn't look anything like the game version. All that was about to change with a few coats of metallic paint. To keep the metallic look consistent, I painted the helmet and the face shield together. Once dried, the helmet looked too nice, it didn't look like a battle-hardened piece of combat gear. I used a mixture of weathering wash, rub-n-buff, and watered-down paint to add scrapes, shot marks, and scuff marks. I was really happy with how it came out with just a little bit of weathering.
At this point, we have a really accurate video game prop! We could be done right here, but I wanted to go a step further by making it functional welding helmet. To accomplish this I order a replacement welding shield made out of polycarbonate. This is a super-tinted piece of plastic instead of an auto-darkening piece of specialty glass...read more at https://www.iliketomakestuff.com


