Making a Leather Guitar Strap // Leatherworking
Description
I have more guitars than I do guitar straps, so I took this as a challenge to make my own leather guitar strap using some scrap leather I had on hand. This was a really simple project using a paper template that I drew out. That template is available below so you can make on too!
Subscribe to my channel: http://bit.ly/1k8msFr
Second Channel: http://bit.ly/iltms-2
MORE PROJECTS, POSTS AND EVENTS
http://www.iliketomakestuff.com
TOOLS & SUPPLIES WE USED(affiliate links):
https://iliketomakestuff.com/shop/product/leather-guitar-strap-template/
https://kit.co/iliketomakestuff/my-leather-working-tools
https://kit.co/iliketomakestuff/shop-safety-gear
I WROTE A BOOK!!
http://www.iliketomakestuff.com/makingtime
Want to support ILTMS? Get exclusive content and more...
http://www.iliketomakestuff.com/patreon
BUY A SHIRT, STICKER, NOTEBOOK, DIGITAL PLANS and MORE!!
http://www.iliketomakestuff.com/store
FOLLOW:
http://twitter.com/iliketomakestuf
http://www.twitch.tv/iliketomakestuff
http://instagram.com/iliketomakestuff
http://facebook.com/iltms
MUSIC: http://share.epidemicsound.com/iltms
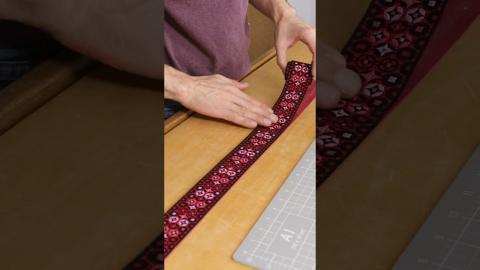
This leather guitar strap was loosely modeled off of an existing strap that I really like. I took the older strap and laid it out on a large roll of paper. After tracing the old strap and adding some modifications like more material in the shoulder, I cut it out using some scissors. Templates don't have to be replicas of existing guitar straps, you could mimic a curved shoulder strap like one you'd find on a duffle bag or briefcase. Now that I had the overall shape of the two leather guitar strap pieces, I transferred those lines to a larger piece of hide.
The best way i have found to cut leather is with a really sharp box cutter. I also used a long straightedge to make sure by lines were nice and clean when cutting. Since there wasn't any complicated curves or seems to sew, this step went really quick. Because the strap was an interlocking mix of two straps, I had to mark and cut some adjustment holes. These holes are necessary so that you can weave the smaller strap through the larger one, increasing or decreasing the overall strap's length. I punched out the outer limits of those elongated holes with a hole punch and connected them with the boxcutter.
For some added flare, I used a brass branding iron that our good friend Winston Moy made for me to burn the I Like To Make Stuff logo into the end of the strap. This was the first time I tried to brand leather, and the burning creeped a little leaving the logo a little blurry. I will totally revisit this practice later to make sure that I can get some nice crisp lines.
Some people really like the raw, tan-ish leather look, but I wanted to dye my new strap dark brown. My older strap is black, so like any accessory, I had to be ready for any formal occasion and have a brown one too. I used some walnut colored dye applied to both sides of each piece and let is dry. I burnished the edges to prevent fraying and rubbed it down with some leather wax to protect the finish. After all of that was dry, it was time to attach the leather strap to the guitar.
There are a few ways to connect the strap to the guitar. First, you could punch a hole on the ends of the strap and cut a small slit for the guitar's attachment nut to fit into. Secondly, and more securely, you can get some locking strap nuts. These are small spring-loaded fittings that you attach to your guitar strap with some small lock nuts. You pull up on the fitting and it locks the guitar's nut into place, preventing it from accidentally falling out of the punched hole when rocking out. I had some spare strap nuts mixed in with my music equipment so I threw them on and connected my favorite guitar.
I am constantly impressed by working with leather. It is so fun to work with and the results are really durable and they look amazing. Buying leather goods can be rather expensive and getting a guitar strap that is custom made to fit you can be really rare. This easy leatherworking project took only a few hours, and most of that was waiting for the dye to dry. I encourage you to try this project for yourself or for someone you know who plays and instrument. We've got a free pdf template up above so you can go give it a try!


