How to make a Simple Fire Pit & Tie Fighter Grill
Description
We wanted a fire pit in the backyard so of course I gave it a Star Wars spin. Check out https://www.iliketomakestuff.com for cool merch, new podcasts, and all of the ILTMS projects!
Subscribe to my channel: http://bit.ly/1k8msFr
Second Channel: http://bit.ly/iltms-2
MORE PROJECTS, POSTS AND EVENTS
http://www.iliketomakestuff.com
NEW PODCASTS!
http://iliketomakestuff.com/podcast
TOOLS & SUPPLIES (affiliate links):
https://kit.com/iliketomakestuff/my-metalworking-tools
https://kit.com/iliketomakestuff/shop-safety-gear
High Heat Max Spray Paint: https://www.amazon.com/dp/B00GXHXKN8?tag=ilik-20
Twitch Stream Every Wednesday @ 11am EST: www.twitch.tv/iliketomakestuff
I WROTE A BOOK!!
http://www.iliketomakestuff.com/makingtime
Want to support ILTMS? Get exclusive content and more...
http://www.iliketomakestuff.com/patreon
BUY A SHIRT, STICKER, NOTEBOOK, DIGITAL PLANS and MORE!!
http://www.iliketomakestuff.com/store
FOLLOW:
http://twitter.com/iliketomakestuf
http://www.twitch.tv/iliketomakestuff
http://instagram.com/iliketomakestuff
http://facebook.com/iltms
Our backyard has a really nice bundle of trees that we really enjoy. Convenient for this project, in the most lush part of the year, there is a big opening right in the middle. I decided to put the fire pit right under that clearing. This is very important because you don't want the fire to accidentally ignite any leaves or branches that are above it. Luckily, this spot was also pretty level.
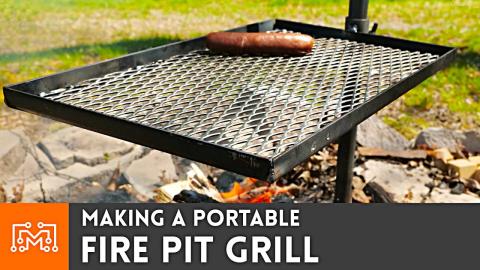
I began this project by purchasing a grill grate on which we would cook our food. It would be absolutely practical to build the fire pit so that this grate sat on the edges of the bricks, chimney style. But such a design presented a problem, if I wanted to add logs then I would have to remove the grate (which doesn't have handles) and risk spilling my food on the ground. So to allow for room to stoke the fire, I would have to suspend the grill grate over the middle of the fire pit.
At Lowe's, I found some decorative bricks that I liked and laid them out on the ground to find a size that worked. Using those bricks, I found that 14 of them would make a perfectly-sized fire pit.
I decided that 4 levels of brick would work for this project. One row would be partially buried to add foundational support and the other three would provide some protection for smaller kids around the fire. If you're doing the math at home, that's 56 bricks, ugh. So Josh and I lugged all those stones from store to Cruiser to back yard to final resting place.
I drove a stake into the center of my fire pit so that I could have a reference point when stacking our circular walls. After digging out a little bit of the ground for the first level, I started arranging the bricks. To allow for air flow, I spaced a few brick apart at the bottom. And once I had the first layer set, we just started stacking in an overlapping pattern until the walls were up.
The fire pit was done. We could sit and relax while watching the sunset, listening to the crackle of burning scrap wood...but I'm hungry and this thing needs to cook food. Remember that we needed some kind of support to hold up the grill grate? Well, as I do, I got a geeky idea. Instead of just setting two metal bars on top of the bricks and laying the grate on them, I decided to weld up a metal support that resembled Darth Vader's Tie Fighter from Star Wars.
First, I measured the distance across the fire pit to roughly the center of the bricks. Then I transferred this measurement to my shop floor with some chalk and traced out the grate in the center. I drew out the angular pieces of the Tie Fighter wings and measured them with my digital angle gauge. Using a Sharpie, I drew these angles onto some 3/4" steel square tubing. The plan was to cut these triangular notches in the top of the tube and then bend the steel using the one uncut side as a hinge. I welded up these joints and repeated the process for the other wing as well as the two longer grill supports.
After a few coats of high heat spray paint, I used some JB Weld to attach the grate to the Tie Fighter Supports and the grip was finished. I lugged that heavy thing outside to the fire pit and set it in firmly in place. My plan totally worked, I had plenty of room to add new logs on the fire, I cooked up some lunch for Josh and I, and I really like the way it looks!


