How to Make a Catapult (2 MILLION SUBSCRIBERS!)
Description
I would like to thank everyone of you for subscribing to my channel and making I Like to Make Stuff a reality. To commemorate the event, we made a quick and easy catapult!
Subscribe to my channel: http://bit.ly/1k8msFr
Second Channel: http://bit.ly/iltms-2
MORE PROJECTS, POSTS AND EVENTS
http://www.iliketomakestuff.com
TOOLS & SUPPLIES (affiliate links):
https://kit.com/iliketomakestuff/catapult
https://kit.com/iliketomakestuff/my-woodworking-tools
https://kit.com/iliketomakestuff/shop-safety-gear
Twitch Stream Every Wednesday @ 11am EST: www.twitch.tv/iliketomakestuff
I WROTE A BOOK!!
http://www.iliketomakestuff.com/makingtime
Want to support ILTMS? Get exclusive content and more...
http://www.iliketomakestuff.com/patreon
BUY A SHIRT, STICKER, NOTEBOOK, DIGITAL PLANS and MORE!!
http://www.iliketomakestuff.com/store
FOLLOW:
http://twitter.com/iliketomakestuf
http://www.twitch.tv/iliketomakestuff
http://instagram.com/iliketomakestuff
http://facebook.com/iltms
MUSIC: http://share.epidemicsound.com/iltms
A catapult is an ancient weapon made by placing a projectile into an arm and pulling that arm under tension. Once the tension is released, the arm swings forward, launching the projectile at thine enemies! In this case, our projectiles are dodgeballs and old fruit from my refrigerator.
I'm using 2x4s for the catapult frame. The frame is made of two side walls connected at the bottom with stringers. The side walls are made of an 8 foot 2x4 at the base, and a shorter 2x4 attached in the middle as an upright. Because there would be a lot of toque applied to this upright, I use the remainder of that piece as a 45 degree cross brace. You could use pocket holes for this project, but I wanted to build it fast and dirty, so I used construction ties. These are used in home building and simply connect the two board together with the external plate.
I originally thought there should be a horizontal stop that the arm would hit, thus multiplying the arm's fling-ability, but it was completely unnecessary and actually worked against the design. With both side walls connected by the lower stringers, it was time to focus on the launching arm.
I had originally thought of using another 2x4 for the launching arm, but Josh reached back to his college engineering days when he built a catapult in his apartment. He noted that the arm had to be super lightweight so that we don't waste energy stored in the tension trying to lift a heavy lumber arm. So, I dug through my scrap bin and found an aluminum channel. This beam was rigid and lightweight and would work perfectly.
We drilled a hole through the bottom of the arm and centered it onto a threaded rod Axel that would mount to the base. To hold our projectiles, we used our large shop dustpan because it provided a shallow bottom for the fruit to sit and had a handle that could be zip-tied to the arm without damaging it.
To hold the tensioned arm down before launch, I used some really cool barrel latches. These were mounted at the rear of the base and could catch the arm using a small bracket. I used two latches to hold the arm evenly and Josh tied the two together using paracord. A longer line was tied to the joined latches and would back as the pull-cord used to release the catapult.
To power the catapult, I decided to use surgical tubing. It is amazingly stretchy, quite durable, and comes in large rolls. We screwed in some eyelets at the top of the uprights and secured the tubing to them using zip-ties. I ran the tubing through the uprights and around the arm. Not knowing how tight to pull the tubing, we did a small shop test to see how far I could launch a roll of tape. I purposely left one side of the tubing disconnected so I could make on-the-fly adjustments.
After testing larger projectiles, I decided to double up the tubing and shortened it to a semi-scary tension. We took the whole contraption outside and started launching stuff!
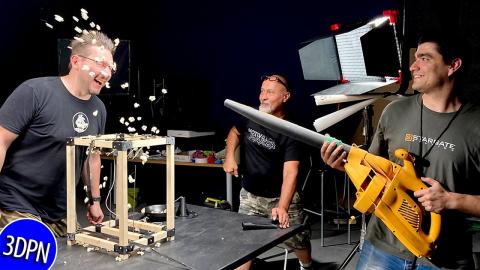
It was loads of fun and as soon as my kids got home, we shot marshmallows and popcorn at them too! I was really surprised at how well this quick and dirty catapult worked. Thank you to my kids for the super fun suggestion and thank you to all of you for helping make this channel what it is today. I am incredibly humbled and honored that so many of you have chosen to support what we do here at I Like to Make Stuff. And we hope that you are empowered to do more in your lives because of the content we are producing.


